How To create ‘JNDI’ Connection for Reports
Most important benefit of JNDI over JDBC is that it provides
centralized access/management of database connection used in different files (prpt/xaction,
xml, jsp etc.)So if you are using JNDI for your PUC reports or Analysis reports
and you want to update any database credentials you can update in one place and
it is affected in your all reports and analysis.
JNDI
|
JDBC
|
Need
to define credentials at one place
|
Need to define
credentials(jdbc connection) in every file
|
Update at one place and
changes will be updated in every file which is using that JNDI connection
|
Need to update each place
in the file where JDBC connection is defined
|
This is faster as only you
need to create connection one time.
|
This is slower because
every time it is creating new connection.
|
Creating
a JNDI connection:-
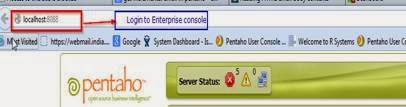
1)
Login to Pentaho
enterprise console :-
*replace localhost with your server IP address.
2)
Now click on Administration
tab of Penataho Enterprise Console to create/view/edit database connection

Here you can
view all of connections created on the Pentaho Enterprise Console and new connection
to the database can be created.

Now let’s
create a new connection (for SQL Server) by clicking on [+] explore button:-
1)
Put name of the
connection, this name will be used as name of JNDI connection.
i.e. pentahoLocal
2)
Select database driver
as Net.sourceforge.jtds.jdbc.Driver from drop down.
3)
Enter appropriate
user name and password.
4)
Put connection URL
for your database connection.
i.e. jdbc:jtds:sqlserver://SVAISH-PC:1433/pentaho;instance=SQL2008R2
For more details please refer below screenshot:
Now test
your connection by clicking “Test” button at the bottom of the page.

If you get
success message then click on “Update” button so that this
connection can be available on PUC (Pentaho user console).later this (connection)
can be referred on Reports and Analysis as a JNDI connection name.
Now select
Services tab on Enterprise Cconsole to get update/refresh screen.

Now Refresh
Pentaho BI Server (PUC) to get server updated for these new changes.

Now login to
Pentaho user console (PUC)
Now refresh
PUC by clicking refresh button.

Creating
a JNDI connection on Pentaho Report Designer
1)
open Pentaho Report Designer and create a
new report
2)
now right
click on dataset to create a JNDI/JDBC connection

3)
now click on JDBC
to create a new JNDI/jdbc connection

Now click on expand [+] to create/edit a new connection

Now
create/edit connection for JNDI which will be used inside PUC Report.

Now publish your report on PUC.

This report
will run on JNDI connection.
Most important benefit of JNDI over JDBC is that it provides
centralized access/management of database connection used in different files (prpt/xaction,
xml, jsp etc.)So if you are using JNDI for your PUC reports or Analysis reports
and you want to update any database credentials you can update in one place and
it is affected in your all reports and analysis.
|
JNDI
|
JDBC
|
|
Need
to define credentials at one place
|
Need to define
credentials(jdbc connection) in every file
|
|
Update at one place and
changes will be updated in every file which is using that JNDI connection
|
Need to update each place
in the file where JDBC connection is defined
|
|
This is faster as only you
need to create connection one time.
|
This is slower because
every time it is creating new connection.
|
|
|
|
Creating
a JNDI connection:-
1)
Login to Pentaho
enterprise console :-
*replace localhost with your server IP address.

2)
Now click on Administration
tab of Penataho Enterprise Console to create/view/edit database connection

Here you can
view all of connections created on the Pentaho Enterprise Console and new connection
to the database can be created.

Now let’s
create a new connection (for SQL Server) by clicking on [+] explore button:-
1)
Put name of the
connection, this name will be used as name of JNDI connection.
i.e. pentahoLocal
2)
Select database driver
as Net.sourceforge.jtds.jdbc.Driver from drop down.
3)
Enter appropriate
user name and password.
4)
Put connection URL
for your database connection.
i.e. jdbc:jtds:sqlserver://SVAISH-PC:1433/pentaho;instance=SQL2008R2
For more details please refer below screenshot:

Now test
your connection by clicking “Test” button at the bottom of the page.

If you get
success message then click on “Update” button so that this
connection can be available on PUC (Pentaho user console).later this (connection)
can be referred on Reports and Analysis as a JNDI connection name.
Now select
Services tab on Enterprise Cconsole to get update/refresh screen.

Now Refresh
Pentaho BI Server (PUC) to get server updated for these new changes.

Now login to
Pentaho user console (PUC)
Now refresh
PUC by clicking refresh button.

Creating
a JNDI connection on Pentaho Report Designer
1)
open Pentaho Report Designer and create a
new report
2)
now right
click on dataset to create a JNDI/JDBC connection

3)
now click on JDBC
to create a new JNDI/jdbc connection

Now click on expand [+] to create/edit a new connection

Now
create/edit connection for JNDI which will be used inside PUC Report.

Now publish your report on PUC.

This report
will run on JNDI connection.